- Home
- SHOP ECO FARM
-
TOP BRANDS
-
Grow Lights Brands
- Adjust-A-Wing
- Apollo Horticulture
- Bestva
- Black Dog LED
- California Lightworks
- ChilLED Grow Light
- Eco Farm
- HLG - Horticulture Lighting Group
- Kingled
- Kind LED
- Mars Hydro
- Morsen
- Neilo
- NextLight
- Phlizon
- PlatinumLed
- Roleadro
- Optic LED Grow Lights
- ViparSpectra
- Vivosun
- EYE Hortilux
- IPOWER
- NanoLux
- Phantom grow light
- Gavita grow lights
- Grower's Choice
- Lumatek
- Maxibright
- Yearld Pro
- ThinkGrow
- Crecer Lighting
- Green Sunshine Electric Sky
- fohse aries
- loriflux
- luxx
- fluence
- iluminar
- Lex
- LTC
- Rayonled
- FGI
- PHOTONTEK
- Grow Tents & Kits Brands
- Extraction & Harvest Brands
- Climate Control & Hydroponic Brands
-
Grow Lights Brands
- COMPANY INFO
- COOPERATE WITH US
- Blog
- Sign in
- Home
-
SHOP ECO FARM
- ECO Farm Grow Lights
- ECO Farm LED Grow Lights
- ECO Farm Quantum Board
- ECO Farm Samsung LED Grow Lights
- ECO Farm COB Grow Lights
- ECO Farm Commercial Lights
- ECO Farm Supplemental Grow Light
- ECO Farm Fluorescent grow lights
- ECO Farm HPS & MH Grow Lights
- ECO Farm CMH Grow Lights
- ECO Farm HID/CMH Bulbs & Ballasts
- ECO Farm Grow Tents & Kits
- ECO Farm 2x2ft Grow Kits
- ECO Farm 3x3ft Grow Kits
- ECO Farm 3.3x3.3ft Grow Kits
- ECO Farm 4x4ft Grow Kits
- ECO Farm 5x5ft Grow Kits
- ECO Farm Grow Tent - Standard Style
- ECO Farm Grow Tent - Extension & Roof & Lodge Style
- ECO Farm Extraction & Harvest
- ECO Farm Rosin Press Machine
- ECO Farm Dry & Wet Trimmers
- ECO Farm Oil Accessories
- ECO Farm Medicinal Plants Grinder
- ECO Farm Medicinal Plants Containers
- ECO Farm Medicinal Plants Dryer
- ECO Farm Refrigeration Dryer
- ECO Farm Climate Control & Other Accessories
- ECO Farm Inline Duct Fans
- ECO Farm Oscillating Fans
- ECO Farm Exhaust Fans
- ECO Farm Air Filter
- ECO Farm Duct Muffler
- ECO Farm Ventilation Kits
- ECO Farm Plant Humidifiers
- ECO Farm Plant Dehumidifiers
- ECO Farm Hydroponic Accessories
- ECO Farm Other Accessories
- ECO Farm Hydroponics Microscopes
-
TOP BRANDS
- Grow Lights Brands
- Adjust-A-Wing
- Apollo Horticulture
- Bestva
- Black Dog LED
- California Lightworks
- ChilLED Grow Light
- Eco Farm
- HLG - Horticulture Lighting Group
- Kingled
- Kind LED
- Mars Hydro
- Morsen
- Neilo
- NextLight
- Phlizon
- PlatinumLed
- Roleadro
- Optic LED Grow Lights
- ViparSpectra
- Vivosun
- EYE Hortilux
- IPOWER
- NanoLux
- Phantom grow light
- Gavita grow lights
- Grower's Choice
- Lumatek
- Maxibright
- Yearld Pro
- ThinkGrow
- Crecer Lighting
- Green Sunshine Electric Sky
- fohse aries
- loriflux
- luxx
- fluence
- iluminar
- Lex
- LTC
- Rayonled
- FGI
- PHOTONTEK
- Grow Tents & Kits Brands
- Apollo Horticulture
- Black Box
- CoolGrows
- Eco Farm
- GrowLab
- Gorilla Grow Tents
- Mars Hydro
- Quictent
- Secret Jardin
- Unit Farm
- TopoGrow
- VIVOSUN
- Topolite
-
COMPANY INFO
-
COOPERATE WITH US
- Blog
ECO Farm LM301B UV&IR 450W Quantum Board VS MIXJOY GL4000s LED Grow Lights
December 13, 2021
Want to start growing plants indoors? Then you’re in the right place as we will show you how to use LED grow lights. In this article, we’ll guide how to develop your indoor garden using LED lights, things to consider when buying growing lights, and lots more.
What Type of LED Grow Light Do do You Need?
Incandescent
It is typically the cheapest type of grow light you can buy, and it’s also easy to find. However, there are some extra precautions to consider with this type of grow light. First, you’ll need to position the LED light at least 24 inches away from your plants.
You should also bear in mind that this type of light can reach a high temperature (which is another reason why you should keep a respectable distance between that and your plants). You might also want to consider the space you choose where your plants grow because the room can quickly become heated. One of the biggest advantages of this type of light is that most come with a built-in clip, making it easy to reposition the angle during different growth stages.
Fluorescent
Fluorescent lights are another cheap option but don’t reach as high of a temperature. They emit blue light and are easy to install.
LED
LED lights are small and inexpensive. They’re also easy to set up and provide both red and blue light intensity. This light source makes an excellent choice for growing plants indoors.
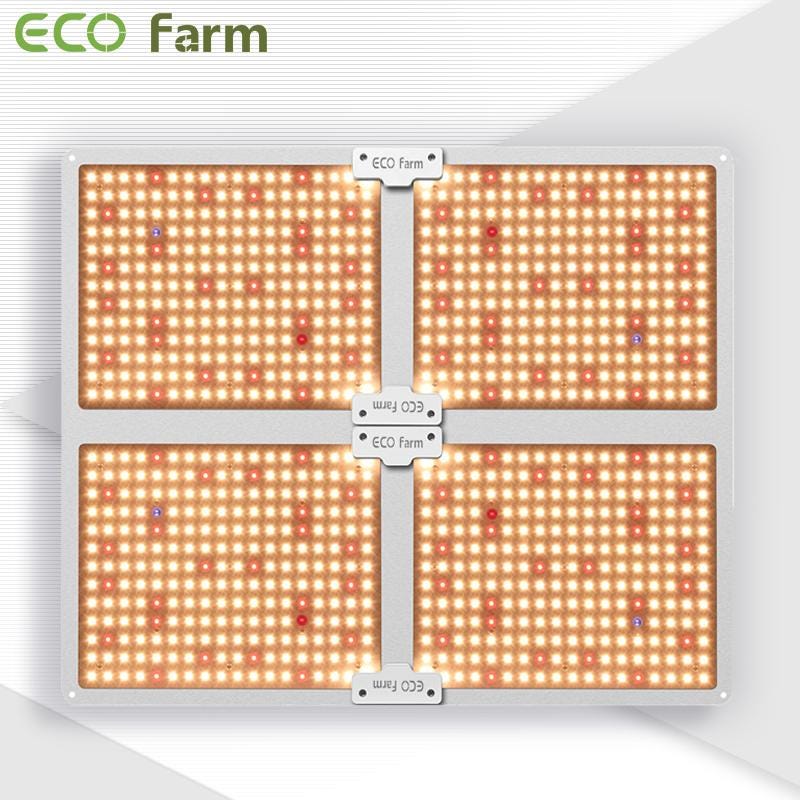
ECO Farm LM301B UV&IR 450W Quantum Board

Features:
This ECO Farm LED Grow Light is designed with Full spectrum(3000K), red light 660nm and IR 730nm and UV 395nm, infinite close to natural light, best for all plants all stages growing, rapid plant response from seed to flower and increase yield & crop quality.This grow light uses the most efficient and safe LED Grow Light, SAMSUNG LM301B diodes (2.7 umol / J), which will not emit a lot of heat, and efficiently save energy and your electricity bill. This Plants Growing lamp makes you get a 30% higher yield and saves up to 50% energy compared to old blurple led lights.It is designed for indoor growers, this LED light quantum board uses aluminum to make it cool down instead use fans, bring you a fanless quiet grow experience.
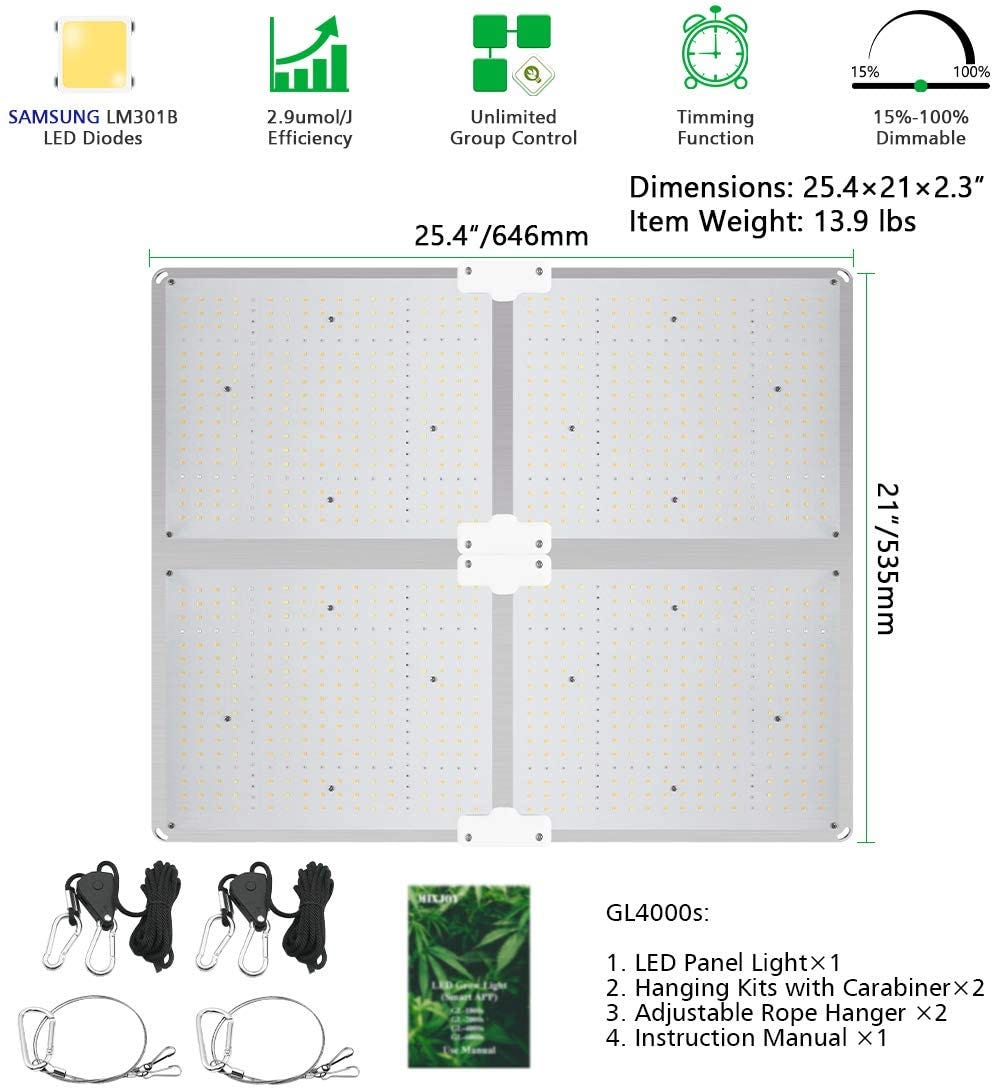
MIXJOY GL4000s LED Grow Lights

Features:
GL4000s uses the most efficient Samsung LM301 3000K and 5000K diodes, significantly increasing Red 660nm and IR 740nm LEDs, with UVA395–405nm LEDs. This optimal, Full Spectrum growing light is ideal for all plant growth statuses. It has multi choice for different growth stages, ‘VEG’ mode, 5000K Bluish lights increase, suitable for seeding/germination and young vegetative growth. ‘Flower’ Mode, Blue lights reduced, 660nm Red lights and IR/UVA turned on, which enhance the light intensity, suit for Flowering and Fruiting. Use ‘All Bright’ Mode to get more Lumen output for fast plant growing. The brightness of all Modes can be dimmed 15%-100% and Timing setting to match your plants’ various growth stages.
How to Garden with Grow Lights
Looking for some tips on how to garden with grow lights? Look no further — I have everything you need right here.
1. Get the Intensity Right
Not all plants have the exact same needs when it comes to light intensity.
While a plant that is native to a dry, sunny climate like the Mediterranean (such as most herbs) will require intense light, a plant that evolved in the tropical jungle will prefer more muted lighting.
You’ll need to play around with your light intensity based on what you are growing. It will be determined by how bright the bulb is as well as how close the plant is to the light source.
If you have plants with different lighting needs, you can accommodate all of them by moving them closer to or further away from the light source.
There are some plants, like begonias, that thrive being only 10 or 11-inches away from the light, while others, like ivy, prefer to be almost 3-feet away!
Pay attention to your plants’ unique lighting requirements as you’re figuring out the proper intensity.
2. Get the Duration Right
A common mistake that many novices grow light users makes (including me) is leaving their grow lights on 24/7.
Think about it — plants aren’t naturally exposed to light 24 hours a day when they’re being grown outdoors. They are exposed to regular periods of darkness and never more than 18 hours per day of light.
Plants need times of light and times of darkness, using the dark periods to respirate.
Respiration is an important part of growth and without it, you may notice that your plants aren’t as strong or have issues setting fruit and buds later on. This is another area where each plant’s individual needs differ, short-day plants, like azaleas, do well with less than 12 hours of light each day.
Long-day plants require up to 18 hours — this category includes most garden flowers and vegetables. Then, some are right in the middle, requiring around 8–12 hours. African violets are an example.
3. You May Need to Water More Often
When you’re gardening with grow lights — particularly with fluorescent lights, which produce more heat — you may find that you need to water your plants more often.
Keep an eye out for signs of under-watering, like wilting and dry, crunchy leaves.
Make sure the soil is kept consistently moist while seedlings are germinating and mist plants regularly to ensure that they get the humidity they need.
4. It Might Not Be the Best Option for All Plants
Not all plants thrive when grown under grow lights, but I’ve yet to find a plant for which they didn’t work wonders.
Leafy greens and most other fruit and vegetable crops (along with houseplants and orchids) grow well under grow lights.
Do keep in mind that there are some plants for which it doesn’t make much sense to start seeds indoors — the list includes things like carrots, squash, and beets, all of which are fragile and don’t hold up well to being transplanted.
Skip growing these under grow lights unless you plan on keeping them there permanently — you won’t want to attempt transplanting these later on.
5. Consider Moving Plants Closer to (or Further from) the Lights
Overheating can occur if you have too many lights — but it can also happen if you have your plants too close to the lights.
Place your lights at least 12–18-inches away from your plants to start.
If it looks like your plants aren’t getting enough light, you can always move them closer later on.
As your plants grow taller, conversely, you may find that you have to raise the lights so the foliage isn’t brushing against the bottom of the light.
6. Don’t Forget to Fertilize
It’s important to be mindful of your plants’ nutrient needs when you are gardening with grow lights, as always.
The challenge with fertilizing fragile seedlings, especially those grown under grow lights, is that the intensity of the light combined with the added nutrients can burn the delicate young seedlings.
Using a natural liquid fertilizer diluted to a quarter of the recommended strength can help.
You’ll have to apply it more often — about once a week — but you won’t have to worry about damaging your plants.
7. Try a Timer
I mentioned earlier that grow lights don’t need to be on 24/7.
Remembering to shut the lights off when you go to bed, however, is another challenge entirely — especially if you have your grow lights set up in an area of your house that you don’t frequent often during the day.
Consider using a power strip with a built-in timer so you don’t have to remember to shut the lights off. That way, your system will be automated and you don’t have to worry about a thing.
Conclusion
Selecting grow lights for plants requires careful consideration, as plants have very different lighting requirements. Seedlings require a lot of bright light to prevent them from becoming leggy. Keep in mind that nearly all plants need at least six hours of darkness. An inexpensive timer will simplify the process.
Also in Indoor Grow LED Grow Light
HLG Greenhouse Pro HE HV 630W LED Grow Light VS Geeklight grow light 480W hydroponic led grow light
October 20, 2023
